Adding and Allocating Purchasing Categories
Introduction
This guide summaries how to add and amend purchasing categories.
Purchasing categories are assigned to stock sheets for use in e-procurement and are used in the finance module.
Each supplier record can to be tagged with a default purchasing category.
Assumptions
You have Head Office user Outlet Setup Permission
Where to find this
In Head Office, go to Outlets, Set Up
Step-by-Step guide
Adding a purchasing category
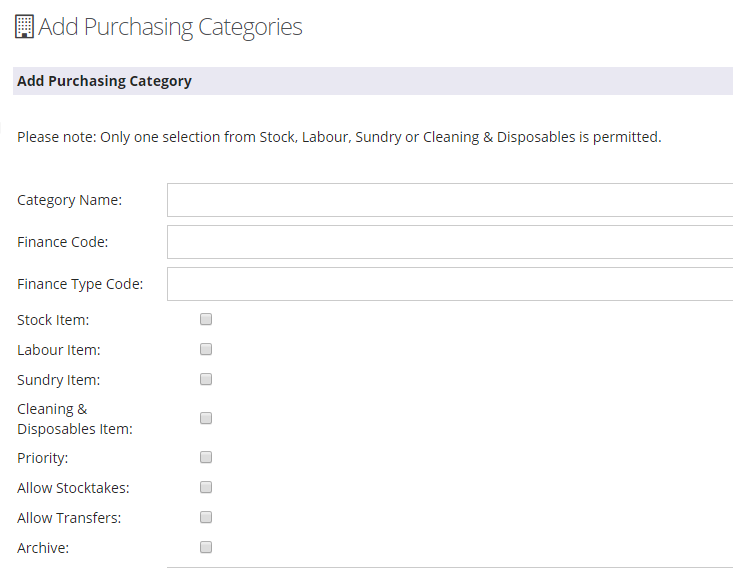
- Click Manage Categories
- This shows you all existing categories.
- Click Add to add a new category
- You will need to enter the name and the finance code (this will be included on your purchase invoice export). Finance Code Type is not required but can be added and built into a bespoke export if required.
- Tick whether the category should be reported as Stock, Sundry, Labour or Cleaning and Dispoables
- Tick Allow Stocktakes and Allow Transfers if you are using the stocktaking module and wish to record stocktakes using this purchasing category
- Leave the other fields as they are not necessary for default use.
- Click Add Category
Allocating favourites
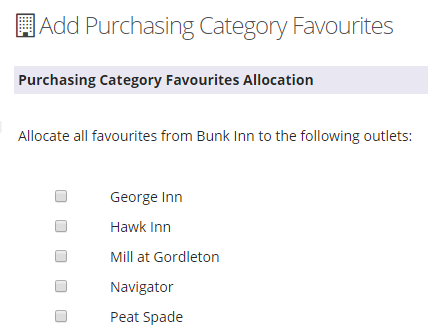
Once your category has been set up, you need to assign it to your outlets.
This can be done one outlet at a time in Outlet, Set Up, Outlet Favourites.
Ticking the category as a favourite allows the outlet to use that purchasing category.
Once you have tagged one outlet, you may choose to go to Outlets, Set Up, Allocate Favourites to copy this set up across your other outlets.
Once your outlets have been tagged, they can set up their stock sheets.
Setting a supplier default
In Purchasing, Suppliers click on a supplier record
There is a field for you to select the default purchasing category.
Select the category and click Update Supplier at the bottom of the page to save.
This is used for invoices sent electronically by a supplier for items not on an existing stock sheet and therefore not already tagged to a purchasing category. The same applies for items added to an order when booking off.


