Setting up and managing stock locations
- Ruth Mills
Introduction
This guide explains how to create and manage stock locations which are used for ordering and stocktaking.
Assumptions
- Purchasing categories have been created
- Purchasing categories have been assigned as outlet favourites
- Supplier catalogues have been uploaded
Where to find this
Outlet > StORM > Setup
Step-by-Step guide
Once in Set Up, follow the below steps.
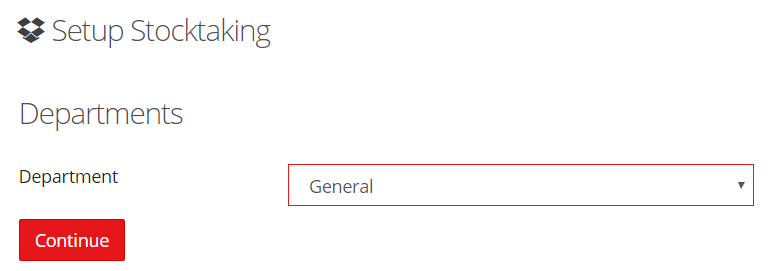
- Select the correct Department and Click CONTINUE.
2. Click New Location in the top right hand corner

3. Name the stock location and leave the Stocktaking and Stock Ordering options ticked. Most clients choose to create a stock location for a specific area, eg Fridge, Dry Stores as this is most useful for them when stocktaking but you may want to have a stock location per supplier.
4. If you are happy to use the same list for both ordering and stocktaking, ensure both options are ticked. Use these tick boxes if you want to create different lists for ordering vs stocktaking. (Line Checks are covered in a separate guide and will need some specific set up)

5. Click Save Location in the top right hand corner
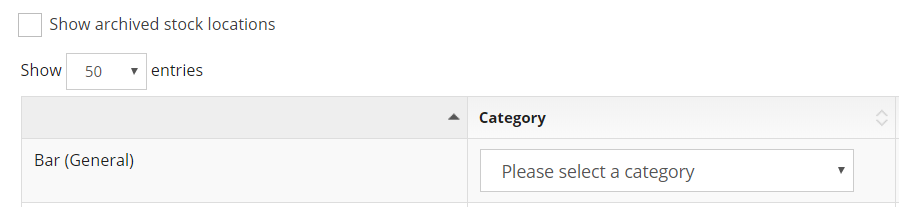
6.Once saved, assign a purchasing category to your location. All items added to this location should fall into the same category as this category is used to assign a finance code to every order and stocktake you record using this stock location.
6. Once you had added a purchasing category, you will be given more options.
Edit - lets you change the name
Items - lets you add items to the location
Archive - lets you archive the stock location. This can only be done if there is no stock recorded against the stock location in the Stocktaking module
Copy - lets you copy this stock location and share it with another outlet

7. Click Items. You will see the page below, this is where you add the required items to your stock location.
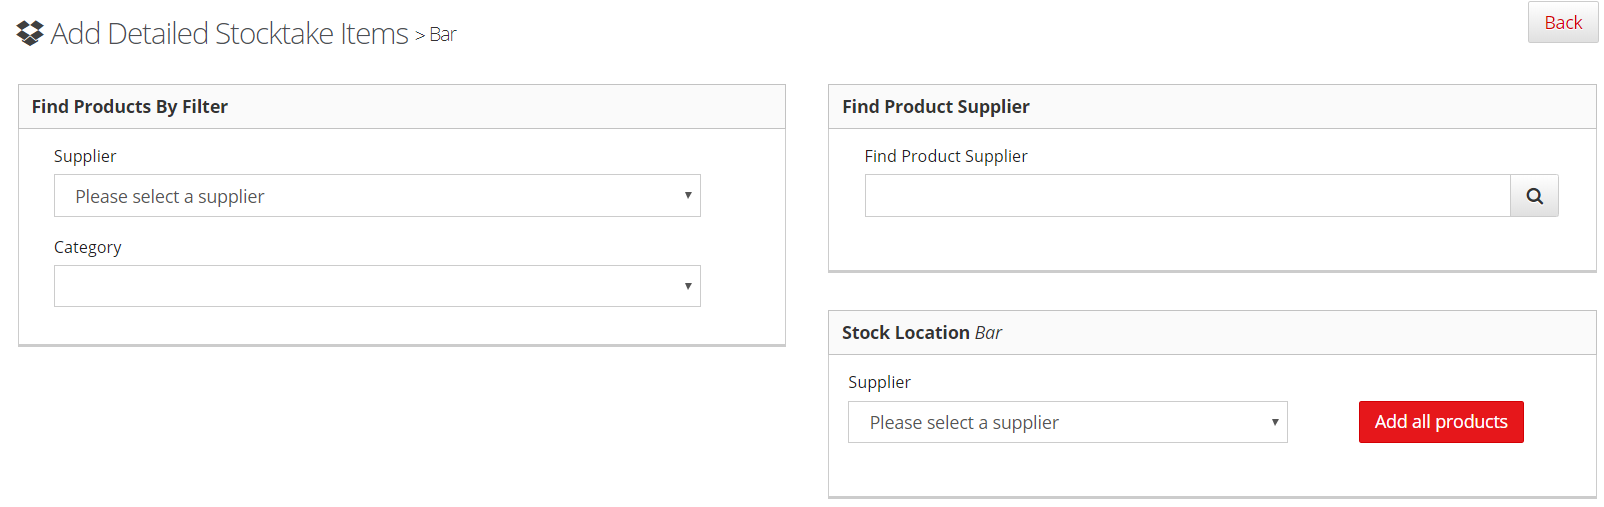
8. Use Find Products By Filter to search through the suppliers and product categories. Click on the plus sign next to an item to add it to your list

Alternatively search for a product by name or product code in the Find Product Supplier section.
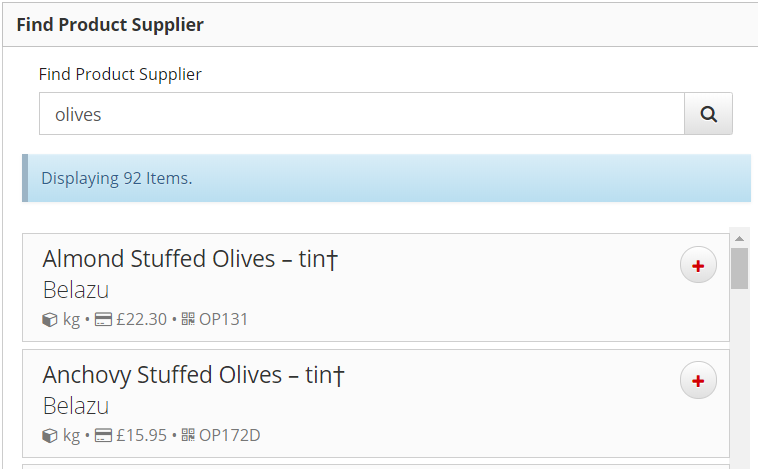
9. You can add products from multiple suppliers to your stock location. Once added, items show in the Stock Location section
10. You can drag and drop the items to put them in the most convenient order
Notes
- You can add items from multiple suppliers to a stock location
- The same item can be added to multiple stock locations but care should be taken when stocktaking to ensure the item isn't counted more than once
- New items added to a supplier catalogue won't be automatically added to a stock location. To add these, click on Items next to the relevant stock location in the set up page and follow the above process to find and add a product.
- Items removed from a catalogue will show as Discontinued and can be removed from a stock location as long as you don't have an outstanding quantity of the item in your latest stocktake. If you do, you can only remove the item from your stock location once you have recorded zero stock of that item.
- An item can be added to a stock location at the point of creating a requisition. See the Requisitions user guide for more info