This guide explains how to record your Banking in the Finance Module within an outlet.
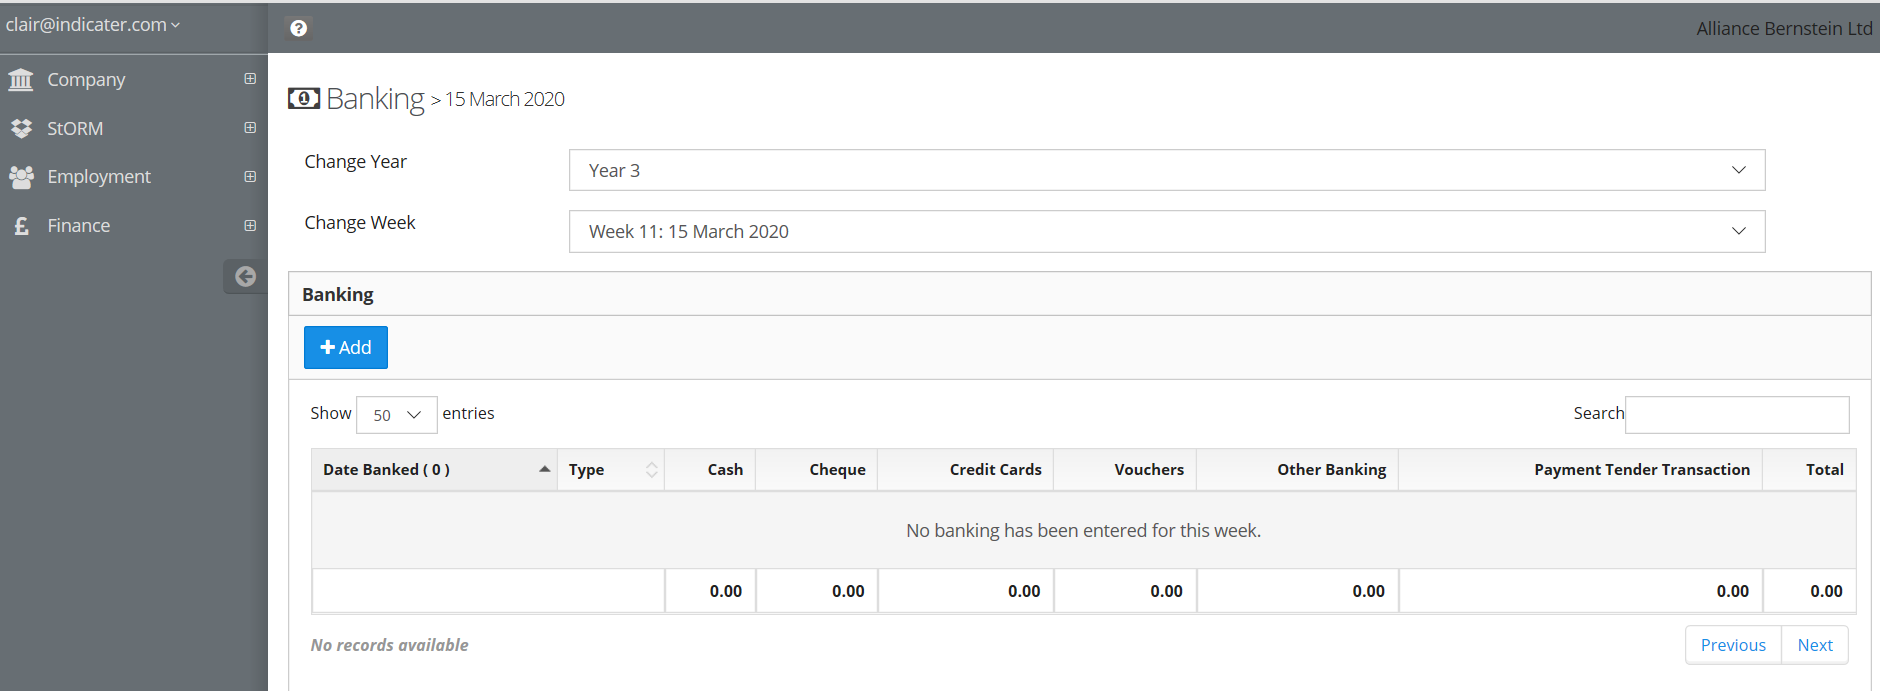
That you have not closed the week-make sure your banking goes in the correct week as there is a drop-down selection.
The date drop-down defaults to current week ,you may record banking against any day in that week.
Click FINANCE > BANKING >ADD
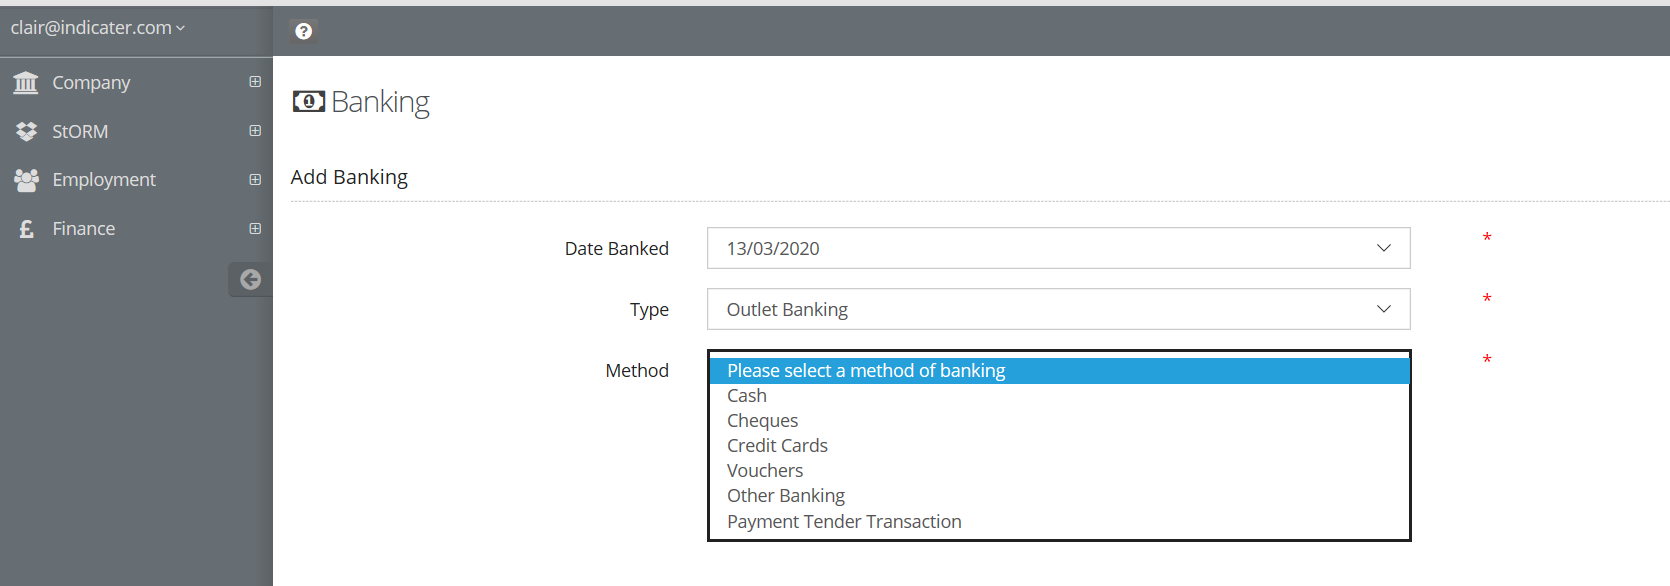
Step 1. Enter the following fields as follows, click on the add sign.


Date Banked : Select from the drop-down the date you are doing the banking , this can be any date in the current week.
Banking Type : Select from drop-down Outlet Banking.
Method: Select from drop-down the mode of payment.
Step 2.1
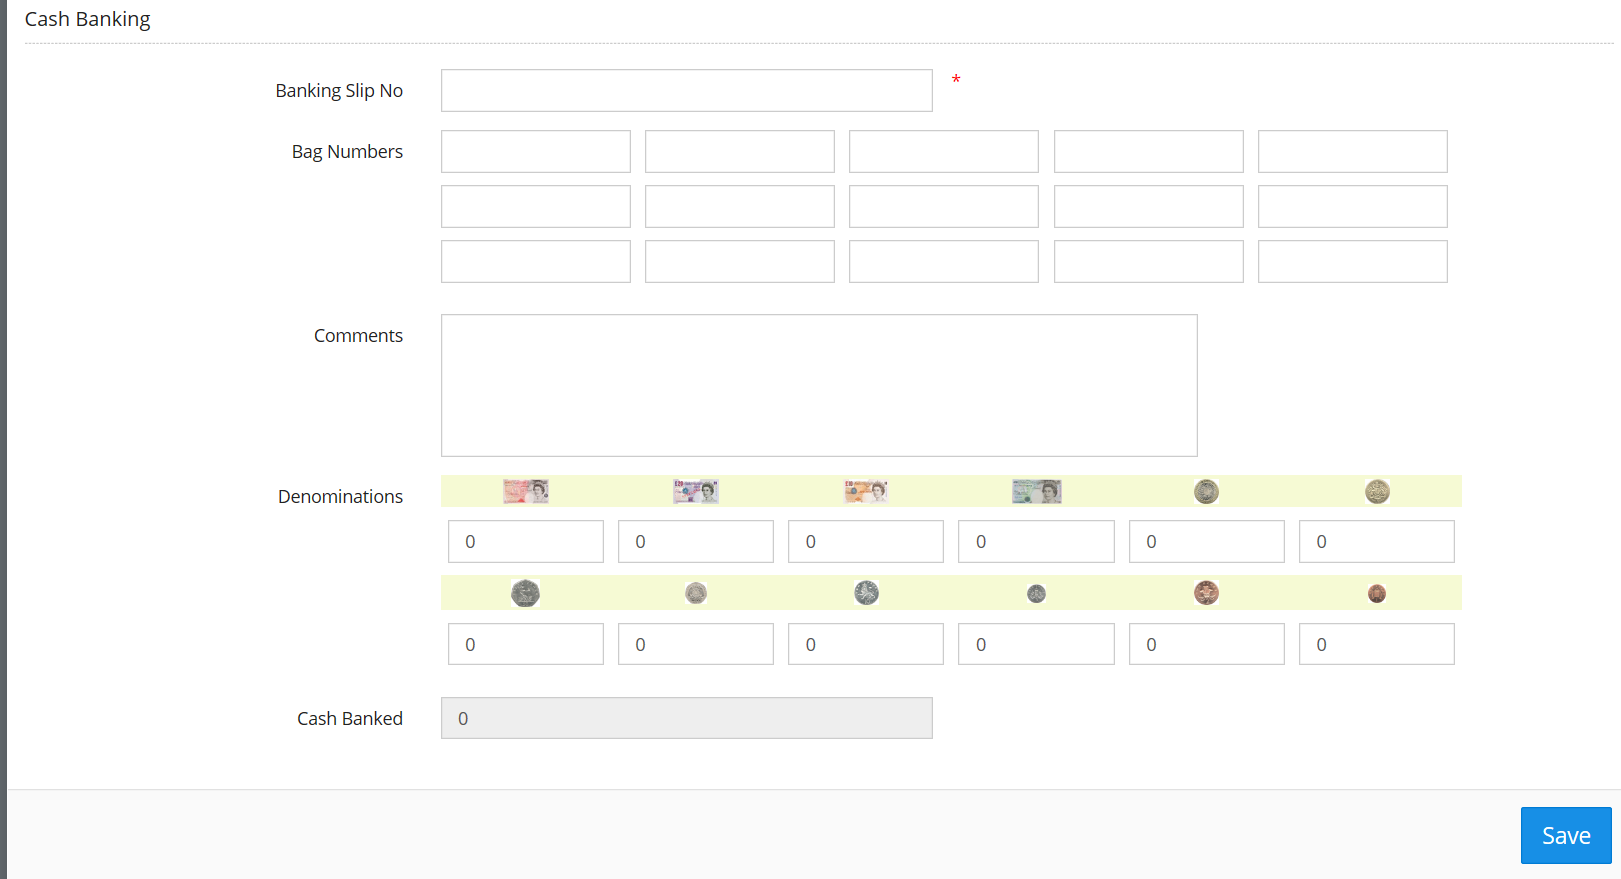
For Cash Banking Complete as follows:
Banking Slip Number: Enter the banking slip number, this field is marked with * to denote its a compulsory field.
Bag Number : Enter bag number (Refer to company policy on recording this, some companies do not require this field to be entered.)
Comments : Enter any comments that may be relevant to the banking
Denominations: Enter the cash you have in the correct boxes and the total can be seen at the bottom.
Click Save
2.2
For Cheque Banking complete as follows
Banking Slip Number : Enter the Banking Slip Number
Reference : Enter any reference that is relevant to the Cheque Banking
Cheques :Enter the Banked value of Cheques
Notes : Enter comments relevant to banking
2.3
For Credit Card Banking complete as follows
Banking Slip Number :Enter the Banking Slip Number
Card Type: Select from the drop-down type of card for example Visa.
Amounts: Enter the value of the transaction
Notes : Enter notes relevant to banking
2.4
For banking to include Voucher
Reference : Enter voucher reference,
Amount : Enter the amount
All banking will automatically be deducted from expected Cash in Hand value in the cash up screen.